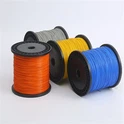
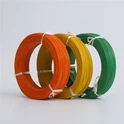
As a supplier of UL20710 multi core copper wire, I've had my fair share of experiences when it comes to connecting these wires to other components. It might seem a bit daunting at first, but with the right knowledge and tools, it can be a breeze. In this blog, I'll walk you through the process step by step.
First things first, let's talk a bit about what UL20710 multi core copper wire is. This type of wire is designed to meet specific safety and performance standards set by Underwriters Laboratories (UL). It consists of multiple copper conductors bundled together within a single cable jacket. The multi core design allows for the transmission of multiple signals or power sources simultaneously, which is super handy in a lot of applications like electronics, automotive, and industrial equipment.
Tools You'll Need
Before you start connecting the UL20710 multi core copper wire to other components, you'll need to gather some essential tools. Here's a quick list:
- Wire strippers: These are used to remove the outer insulation of the wire and expose the individual copper conductors. Make sure you choose the right size of wire strippers for the gauge of your UL20710 wire.
- Soldering iron and solder: Soldering is a common method for making secure electrical connections. A good quality soldering iron with the appropriate tip size and some high quality solder will do the job.
- Heat shrink tubing: This is used to insulate the soldered connections and protect them from short circuits and environmental factors.
- Multimeter: A multimeter is a must have tool for testing the continuity and electrical properties of your connections.
Preparing the Wire
The first step in connecting the UL20710 wire is to prepare it properly. Start by measuring the length of wire you need and cut it using a sharp pair of wire cutters. Make sure the cut is clean and straight.
Next, use the wire strippers to remove a small section of the outer insulation from the end of the wire. Be careful not to damage the individual conductors inside. The length of the exposed conductors will depend on the specific component you're connecting to, but usually, about 1/4 to 1/2 inch is sufficient.
Once you've exposed the individual conductors, you might notice that they are color coded. This color coding is important as it helps you identify which conductor is for what purpose. For example, in a power cable, one color might be for the positive terminal, another for the negative, and others for ground or signal lines.
Connecting to Components
Soldering Connections
Soldering is one of the most reliable ways to connect UL20710 wire to other components. Here's how you do it:
- Prepare the component: If the component has terminals or pads for the wire connection, make sure they are clean and free of any dirt or oxidation. You can use a small amount of sandpaper or a wire brush to clean them if necessary.
- Tin the conductors: Heat up your soldering iron and apply a small amount of solder to the tip. Then, touch the tip of the soldering iron to the exposed copper conductors and apply a bit of solder to each one. This process is called "tinning" and it makes it easier to make a good solder joint later.
- Make the connection: Hold the tinned conductor against the component terminal or pad and touch the soldering iron to the joint. Apply a small amount of solder to the joint until it flows smoothly around the conductor and the terminal. Make sure the connection is secure and there are no loose strands of wire.
- Insulate the connection: Once the solder has cooled, slide a piece of heat shrink tubing over the connection. Use a heat gun to shrink the tubing, which will provide insulation and protection for the joint.
Crimping Connections
Crimping is another option for connecting the wire to components, especially if you don't want to use soldering. Here's how it works:
- Choose the right crimp connector: There are different types of crimp connectors available, so make sure you choose the one that is compatible with the gauge of your UL20710 wire and the component you're connecting to.
- Insert the wire into the connector: Strip the end of the wire and insert it into the appropriate part of the crimp connector. Make sure the wire is fully inserted and there are no loose strands.
- Crimp the connector: Use a crimping tool to compress the connector onto the wire. Apply enough pressure to make a secure connection, but be careful not to over-crimp and damage the wire or the connector.


Testing the Connections
Once you've connected the UL20710 multi core copper wire to the components, it's important to test the connections to make sure they are working properly. Use a multimeter to check the continuity of each conductor. Set the multimeter to the continuity mode and touch the probes to the two ends of the conductor. If the multimeter beeps or shows a low resistance value, it means the connection is good.
You should also test the electrical properties of the circuit, such as voltage and current, to make sure everything is within the expected range. If you notice any issues, such as a high resistance or a lack of continuity, you may need to re-examine the connection and make any necessary adjustments.
Common Mistakes to Avoid
- Overheating the wire: When soldering, be careful not to overheat the wire as it can damage the insulation and the copper conductors. Keep the soldering iron in contact with the joint for only a few seconds at a time.
- Using the wrong tools: Make sure you use the right size of wire strippers, crimp connectors, and soldering iron for the gauge of your UL20710 wire. Using the wrong tools can lead to poor connections and potential safety hazards.
- Not insulating the connections: Always insulate the soldered or crimped connections using heat shrink tubing or electrical tape. This will protect the connections from short circuits and other electrical problems.
Other Related Products
If you're interested in other types of multi core copper wires, we have a few options available. Check out our multi core copper cable, Multi core control cable, Silicone Stranded Wire, multi core electrical cable, and Multi Core Power Cables. These products are also designed to meet high quality standards and can be used in a variety of applications.
Conclusion
Connecting UL20710 multi core copper wire to other components doesn't have to be difficult. By following the steps outlined in this blog, using the right tools, and avoiding common mistakes, you can make secure and reliable connections. If you have any questions or need more information about our UL20710 wire or other products, don't hesitate to reach out. We're here to help you with all your wire and cable needs, and we'd love to start a conversation about your purchasing requirements. Let's talk and see how we can work together to meet your specific needs.
References
- Electrical Wiring Handbook by the National Fire Protection Association
- UL Standards for Safety for Electrical Wires and Cables