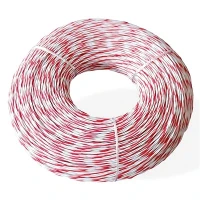
Installing UL1671 tin plated ETFE insulated wire might seem like a daunting task, but with the right guidance, it can be a breeze. As a supplier of this high - quality wire, I've seen firsthand how it can enhance the performance of various electrical systems. In this blog, I'll walk you through the step - by - step process of installing UL1671 tin plated ETFE insulated wire.
Understanding UL1671 Tin Plated ETFE Insulated Wire
Before we jump into the installation process, let's quickly understand what UL1671 tin plated ETFE insulated wire is. ETFE (Ethylene Tetrafluoroethylene) is a high - performance fluoropolymer known for its excellent chemical resistance, high temperature tolerance, and low friction. The tin plating on the wire provides better solderability and corrosion resistance. UL1671 is a standard set by Underwriters Laboratories, which ensures that the wire meets specific safety and performance requirements.
This type of wire is commonly used in a wide range of applications, including aerospace, automotive, and industrial electronics. It's also suitable for use in flexible stranded wire setups, where flexibility is key, as well as in Household Electrical Wire systems.
Tools and Materials You'll Need
- UL1671 tin plated ETFE insulated wire
- Wire strippers
- Soldering iron and solder
- Heat shrink tubing
- Electrical tape
- Multimeter
- Safety goggles
- Gloves
Step 1: Planning and Preparation
The first thing you need to do is plan your wiring layout. Determine the length of wire you'll need and the path it will take. Make sure to avoid any sharp edges or areas that could damage the wire. Also, check the electrical load requirements of your system to ensure the wire can handle the current.
Before you start working with the wire, put on your safety goggles and gloves. Safety should always be your top priority when dealing with electrical components.
Step 2: Cutting the Wire
Once you've planned your layout, it's time to cut the wire to the appropriate length. Use a sharp pair of wire cutters to make a clean cut. Avoid crushing or nicking the wire, as this can weaken it and affect its performance.
Step 3: Stripping the Insulation
Next, you'll need to strip the insulation from the ends of the wire. Use wire strippers that are suitable for the gauge of your UL1671 tin plated ETFE insulated wire. Be careful not to cut into the wire strands while stripping the insulation. A good rule of thumb is to strip about 1/4 to 1/2 inch of insulation from each end of the wire.
Step 4: Soldering
Soldering is an important step to ensure a secure connection. Heat up your soldering iron to the appropriate temperature. Touch the tip of the soldering iron to the exposed wire strands and apply a small amount of solder. The solder should flow evenly around the wire strands. Make sure to clean the soldering iron tip regularly to prevent oxidation.


If you're connecting the wire to a terminal or another wire, hold the two parts together and apply solder to the joint. Make sure the joint is well - soldered and there are no loose strands.
Step 5: Insulating the Joint
After soldering, it's crucial to insulate the joint to prevent short - circuits. You can use heat shrink tubing or electrical tape for this purpose. If you're using heat shrink tubing, slide it over the joint before soldering. After soldering, use a heat gun to shrink the tubing. It will conform tightly to the joint, providing a good seal.
If you're using electrical tape, wrap it tightly around the joint, making sure to cover the exposed wire completely.
Step 6: Installing the Wire
Now that your wire is prepared and the joints are insulated, it's time to install the wire in your system. Route the wire along the planned path, using cable ties or clips to secure it in place. Make sure the wire is not over - bent or stretched, as this can damage the insulation and the wire strands.
Step 7: Testing
Once the wire is installed, it's important to test the system to ensure everything is working properly. Use a multimeter to check the continuity and resistance of the wire. If you're working on a high - voltage system, make sure to follow all safety procedures when testing.
Tips for a Successful Installation
- Choose the Right Gauge: Make sure to select the right gauge of wire for your application. A wire that is too thin may overheat, while a wire that is too thick may be difficult to work with.
- Keep it Clean: Keep your work area clean to prevent dirt and debris from getting into the wire joints.
- Follow the Code: Always follow local electrical codes and regulations when installing the wire.
Applications of UL1671 Tin Plated ETFE Insulated Wire
As mentioned earlier, UL1671 tin plated ETFE insulated wire has a wide range of applications. In the aerospace industry, it's used in aircraft wiring systems due to its high temperature resistance and lightweight properties. In the automotive industry, it can be found in engine compartments and other high - temperature areas.
It's also a great choice for high temperature flexible cable applications, where the cable needs to withstand high temperatures while remaining flexible.
Why Choose Our UL1671 Tin Plated ETFE Insulated Wire
As a supplier of UL1671 tin plated ETFE insulated wire, we take pride in offering high - quality products. Our wire is manufactured to meet strict standards, ensuring reliability and performance. We also offer a wide range of gauges and lengths to meet your specific needs.
If you're in the market for UL1671 tin plated ETFE insulated wire, or if you have any questions about installation or application, we'd love to hear from you. Reach out to us to start a conversation about your requirements. We're here to help you find the best solution for your electrical wiring needs.
References
- Electrical Wiring Handbook, various editions
- Underwriters Laboratories UL1671 Standard documentation